Showing posts with label Crafty. Show all posts

Wednesday, July 25, 2012

Sesame Street First Birthday Party

Let's just start off by saying that if pinterest did not exist, I would not have felt compelled to do half of the projects that I did for Ethan's first birthday party. I started pinning things as soon as he showed a little interest in Sesame Street, which must have been around 3 months old.

If you want to check out the pinterest board CLICK HERE

The majority of Sesame Street supplies was purchased at Party City. They had a huge sale around Memorial Day and another one around July 4th where if you print a coupon from their website, you get $30 off if you spend $100. That came in handy.

For DIY, my favorite thing I did BY FAR was the photobooth, which I copied directly from Red Red Completely Red It was pretty much the easiest thing in the world. I bought the Vitaminer Vimpel Duvet from IKEA for $14.99 and I ordered fun props from The Manic Moose on Etsy. Then we nailed the top of the duvet to the side of the shed and viola!


DIY project #2 was inspired by this blog post. When I told Mark I wanted him to build a wooden bean bag toss game, he looked at me like I was crazy but after looking at the tutorial, he got on board. My original idea was to make 2 sets, one would be Elmo/Cookie Monster and the other would be Big Bird/Oscar. That idea got scrapped when I realized Big Bird would be hard to paint and also when we went to Lowes and saw the price of the wood we needed. So we went with 1 set and I painted one board to look like Elmo and the other to look like Cookie Monster. It came out pretty good considering I did it by hand:


I also made a subway art-esque sign using the Sesame Street theme song lyrics:

For goodie bags, kids got bubbles, sidewalk chalk, Sesame Street bendy straws, crayons, Sesame Street stickers and a whirly pop and I made street sign stickers for the front of the bags with their names on them: 


I also made the balloon wreath that is all over pinterest, with my own little spin on it: 

All in all I was happy with my little projects and Ethan was a very happy Birthday Boy, so I am calling his party a success!


Photobucket

Tuesday, July 5, 2011

Other Random Updates

I've been such an awful blogger lately. I wish I was better about taking my weekly bump photos and doing the weekly post but once third trimester hit, I just got so tired and everything sort of fell by the wayside. I'm trying to be better (see posts below.)

I figured I'd do a post of random other updates. No rhyme or reason to them, just little things that have been going on.

1) Our baby shower was on June 18th. Honestly, I was so overwhelmed by the generosity of our family and friends. Ethan got EVERYTHING he could possibly need. He got so much stuff and it was really fun. My Mom, Mother-in-Law and Aunts planned a beautiful, nautical themed shower at a place right on the Long Island Sound and it was just gorgeous with breathtaking views and really great food!

2) Mark and I did a DIY maternity photo shoot at the local park. It was fun, even though I kind of look like Shrek. Here are some of my favorite shots from the shoot:


3) My next door neighbor's daughter (and the mother of the adorable Kailyn, who my Mom used to babysit.) Recently had a baby boy, Tyler, in March and was thoughtful and generous enough to bring me 2 giant bags of baby clothes that her baby has outgrown. Some stuff still has the tags on! Ethan is soooo set clothes wise in the NB, 0-3 and 3-6 month size. One he hits 6-9 months, we might actually have to buy some stuff for him, but definitely not until then! I am making Kailyn and Tyler matching owl hats for the Fall as a thank you.

4) We are reconsidering Ethan's middle name. We still love Ethan Patrick. It flows so nicely. But Mark has brought up that he has been having second thoughts because he thinks maybe the middle name should be a family name. Ethan Mark is now in the running. We are going to decide for sure when he gets here.

5) The other day, Mark and I spent several hours on Etsy looking for the perfect monthly onesie stickers for Ethan. Surprisingly, Mark got very into this. His main criteria was that they were cute and that the images didn't repeat after a few months. It was adorable that he got so excited about it. We ended up going with farm animals:

6) I flippin' love Pinterest. For those that don't know what Pinterest (www.pinterest.com) is, you NEED to know. It is an online corkboard. Kind of like a visual bookmark board. It is difficult for me to explain at this late hour. Just know that it is awesome. You need an invitation to get an account, otherwise you have to go on the waiting list, which I am told can take a while. I was lucky enough to get an invite. If you want to try pinterest out, shoot me an e-mail and I'll send you one :)

Photobucket

Sunday, October 31, 2010

Etsy: Some stuff I'm making

As I posted the other day, I am opening an Etsy shop. Baby Isabella, my friend Kamila's not quite born yet daughter is going to model some of the stuff I am making so until then I probably will not be putting things up but I wanted to share some pictures of patterns I am working on. I am super excited because I love making this stuff.

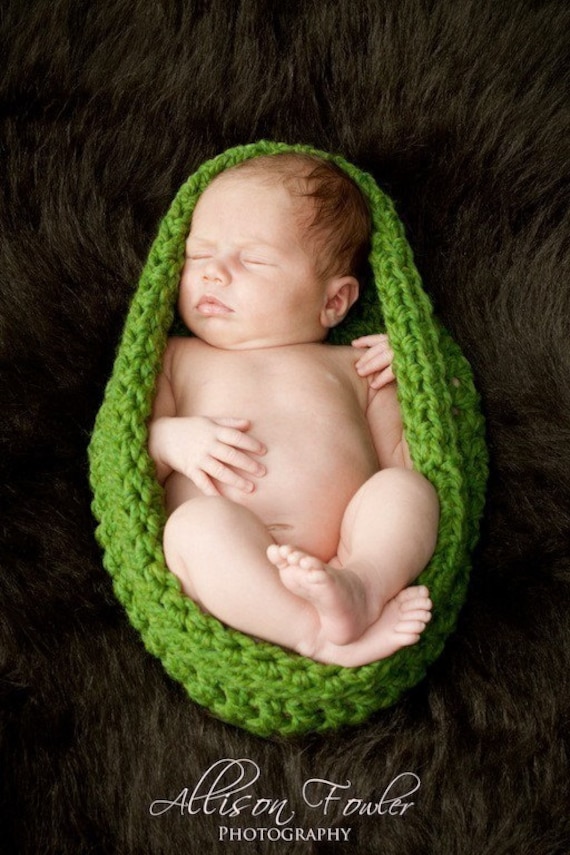
A pea in the pod cocoon sort of like this one. Lot's of people use these for a photography prop in newborn photo shoots and stuff:


Reindeer Hats. I'm going to make a newborn sized one so that Isabella can model, then I'll sell them as made to order.


Some cozy baby booties. They remind me of little Uggs.


Some chunky baby bowls. I like this green but I think I want to make a cream colored one for Isabella to model. Maybe I'll make both.


Santa Hats. They are made with a yarn called fun fur so they are fluffy and fuzzy.


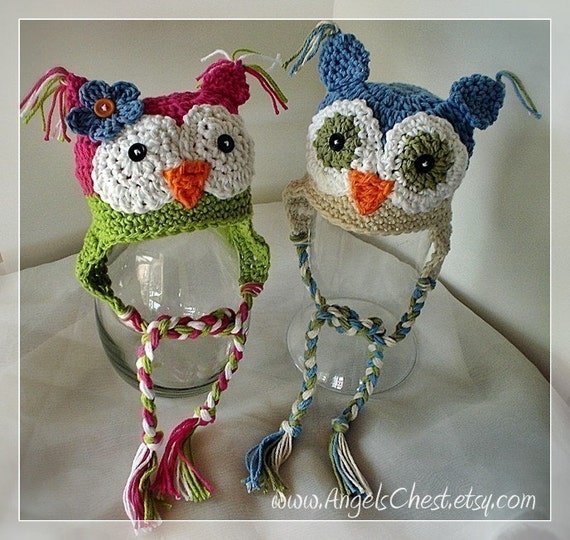
Owly hats. Started a pink one today.


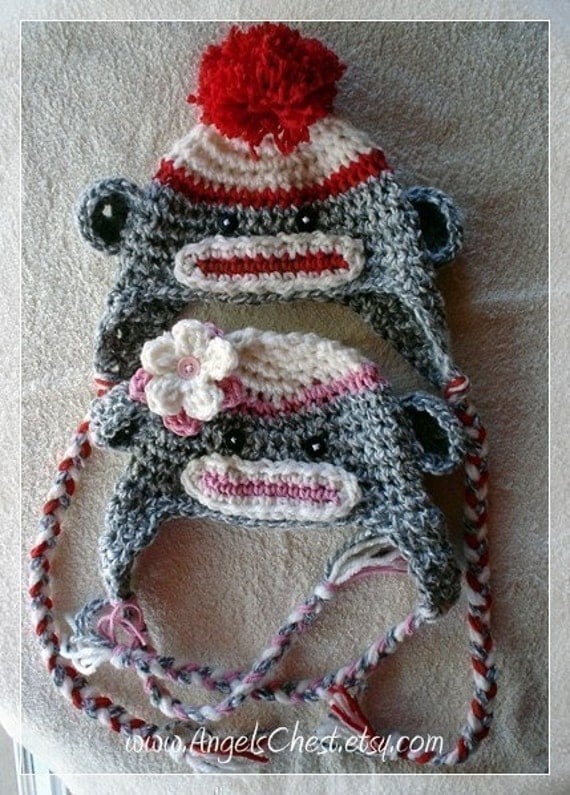
Sock Monkey hats. I kind of want to make one for myself...


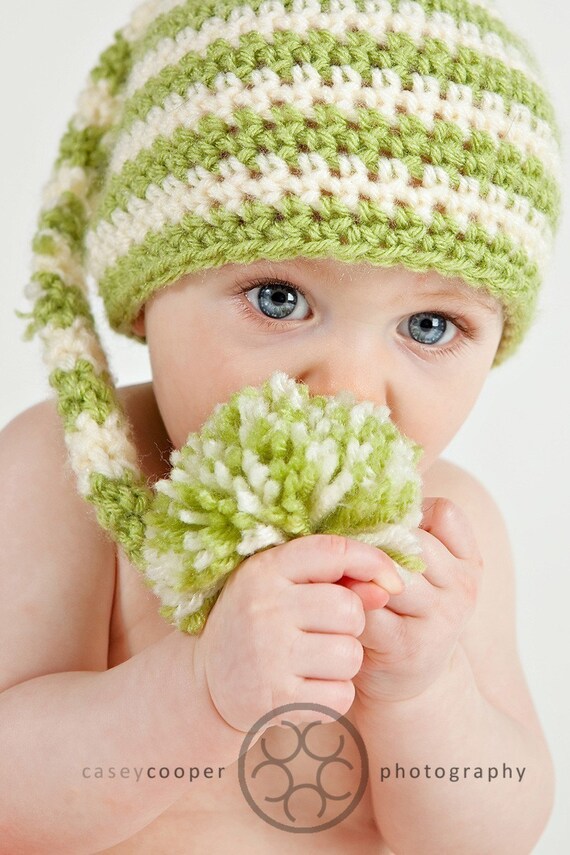
Some stocking hats. They remind me of Twas' the night before Christmas.

I am also planning on making my own pattern for a solid color dog sweater and then have detachable appliques to go onto it. Seasonal ones like a snowflake, shamrock, easter egg, pumpkin, etc. I'd like to make some adult sized scarves also but that will probably be down the road a bit. I am still working on the snowflake crochet blanket that has been in the works as a gift for my Mom for the past 5 Christmases. Maybe I'll actually get it done this year?


Photobucket

Monday, October 25, 2010

I'm Opening an Etsy Shop!

I have been wanting to do it forever. I bit the bullet today and created a banner, opened my Etsy shop and listed my first item (Lil' Pumpkin Hat.)

I realize that its a little late to be listing a pumpkin hat. Most parents would probably want it for Halloween but I figured I need to get started and if 1 person decided to buy the hat then thats great. If no one buys it, I won't be offended or surprised.

I am working on several crochet projects that will soon be listed on Etsy plus I am making several sets of my Cougar Town inspired EAT letters.

Without further ado, here is my Etsy shop:

http://www.etsy.com/shop/CreationsGnS
Photobucket

Monday, October 4, 2010

Cougar Town EAT Letters: My Version & How-To

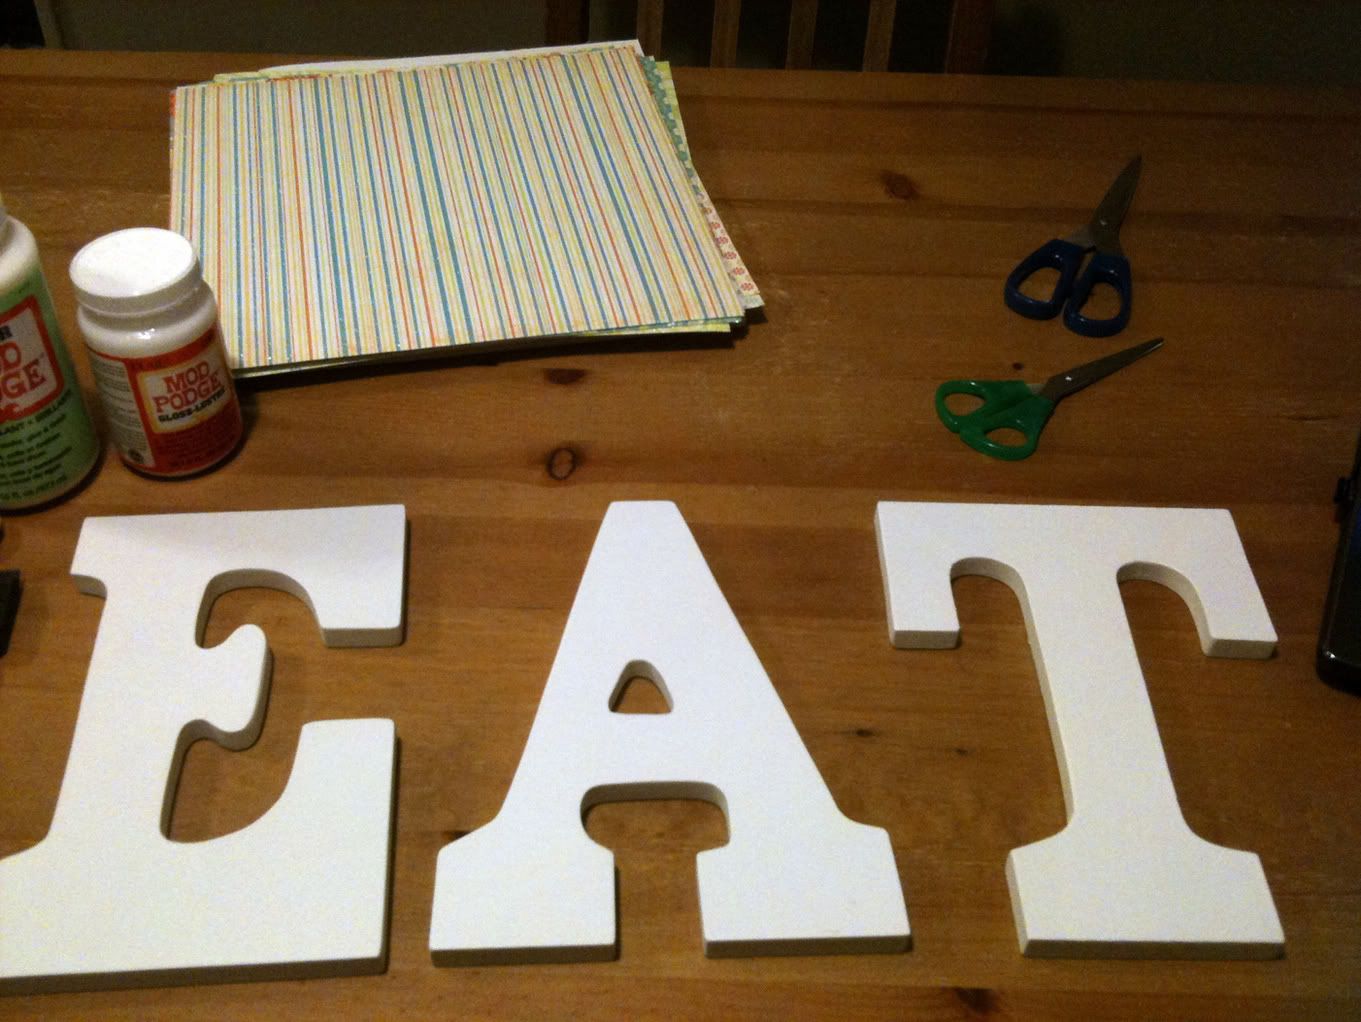
As I posted last week I really love the EAT wall letters in the show Cougar Town and decided to make my own. I am happy to report that this craft project is completed and I am so so so happy with the result. Not to mention that it cost significantly less than it would cost to buy the letters from Anthropologie, where the letters on Cougar Town are from.

Supplies: 
wooden upper-case letters already painted white from Michaels

scrapbook paper (the paper I used was all from the Citrus Stack shown here)
scissors
mod podge
brush or craft sponge

Once you have all your supplies, making these letters is super easy. You just trace the letter carefully onto the scrapbook paper you want to use, cut it out and mod podge it onto the wooden letter. After the glue dries (mod podge takes 20 minutes) cover the entire letter in mod podge several times to seal it, letting it dry for 20 minutes in between each coat. You will end up with this:


Photobucket

Thursday, September 30, 2010

Craft Project: EAT letters kitchen decor

If you watch the show Cougar Town on ABC, then you have probably seen the super cute EAT letters on the wall in the kitchen. If you haven't, you can sort of see them in the upper right hand corner here:

I want them for my kitchen so I went to the trusty Google. Apparently lots of people have the same idea and have been crafting a variation of these for themselves and to sell on Etsy. The most popular way to make them seems to be decoupaging wooden letters with scrapbook paper like they show here.

I love the idea of making the letters of your child's name to hang over their crib/bed or to make other words for decor like Hope, Love, Home, Family, etc. but for now I want Eat, so I am going to head to Michaels and get all the supplies and make this my next non-crochet project. I'll show it off when I'm finished!

Sunday, September 26, 2010

Friday, September 24, 2010

Operation make Megan's hat: semi-FAIL

Not a complete failure because the hat is cute and I'll give it to Megan's Mom Colleen so they can have matching hats. Fail because I was making this hat for a 5 year old and it fits my head. Wayyyyy to big.

This hat was a variation of the pattern for seija set from "The Happy Hooker" by Debbie Stoller. The flowers are from this pattern at this awesome blog: http://mycrochetstuff.blogspot.com/2008/05/little-flowers-with-leaves-free-crochet.html

Next I'll make Megan's hat for reals.
Photobucket

Sunday, September 19, 2010

Baby Isabella's Seija Set: Completed!!

If you crochet, then you probably know about "Stitch n' Bitch Crochet: The Happy Hooker," an awesome crochet book written by Debbie Stoller. That's where I got this super easy pattern from. Keeping with the sugar and spice color scheme from Kamila's baby shower, I made the blanket with Bernat Softee Chunky yarn in Hot Pink, Grass and White. The blanket is good for cold winter days in the car because there is a small slit that the seat belt buckle of a car seat can be slipped through.


Next up: I really need to finish the snowflake blanket I started for my Mom 5 YEARS AGO!! I am determined to be able to give it to her this Christmas. Check out the free pattern I am using to make that blanket here:
Snowflake Blanket

Photobucket


Tuesday, September 14, 2010

Crafty Projects: Invitations

Since I posted the sugar and spice baby shower invitation, I thought I would post pictures of a few more invitations I've made in the past year.

I made baby shower invitations for my Sister-In-Law's shower at the beginning of the year. They did not find out the sex of the baby before it was born so it had to be unisex and I was really surprised that there were not nearly as many cute images that were unisex at places like Fotolia and istockphoto as there were gender specific ones. I did find one image that I really loved and decided to make it the cover of the invitation:

I printed the image on heavy photo (8.5x11 that I cut down to 6x6 squares) paper then printed the inside of the invitation on white card stock.


Then I punched two holes in the top of both pieces and tied with ribbon. I actually made them with a shiny satin lemongrass ribbon but I never took a picture. I do have a picture of the sample I made for my Mother-In-Law using a ribbon I had around the house:


My next project was invitations for my Grandmother's 75th birthday party. Since I had lots of envelopes left over from making the above baby shower invitations, I decided to make the birthday invitations the same size. Again, I wasn't really good about taking pictures of the finished product so we'll just have to settle for a blurry, low-light photo taken with my iphone:


Next, I made Chris and Kamila's wedding invitations. They were having a low-key Fire Island wedding and wanted their invitation to reflect that.


The main invitation was printed on velum paper and backed with white card stock. Both were hole-punched in the left hand corner and roughly tied with some twine for a rough, beachy feel.

Then in July I made some fun invitations for my Uncle's surprise 50th birthday party:


That's all I've got for now! It's 4 in the morning and I need to get some sleep!


Photobucket

Sugar & Spice themed Baby Shower

When I decided that I wanted the baby shower I was throwing for my friend Kamila to be sugar and spice themed, I searched the internet for ideas and came across This Post from the blog Fete Fanatic

That blog post was pretty much the only reference I had so I thought it might be a good idea to post about the sugar and spice themed shower I threw, just in case someone else out there is looking for ideas like I was.

First things first: the invitation. I have been making crafty invitations for various friends & family for the past year and have been getting lots of compliments. I wouldn't say that they are the quality that you would get from ordering your invitations from say http://www.finestationery.com/ (a favorite of mine.) I would say that they have much more of a crafty feel. I purchased some adorable vector images from istockphoto of cupcakes and themed the invitation around that:

It is just white card stock with the invitation printed on it backed with 2 different cardstocks, a solid hot pink and a pink and green stripe. I corner punched the white cardstock for a feminine feel and glued it all together.

Next thing on my mind was decorations. I knew that I was going to do round tables of five with white chairs and I wanted to have a nice centerpiece on each table. My thought process was basically like this: sugar and spice>spice>spice drops>spice drops in a vase! I went to the local craft store and purchased 10 glass vases. 5 were wide ($5 each) and 5 were skinny ($3 each). Then I bought 15 bags of spice drops for $1 each at Wal-Mart and some pretty pink and green ribbon that I spotted while I was there. The day before the shower, I went to Costco and bought 3 pink-themed bouquets for $14.99 each.

I placed the skinny vase in the middle of the wide one and filled in the space between the two with spice drops. Then I put some water and flowers in the skinny vase, tied a ribbon around both the skinny and wide vases (I used a bit of scotch double sided tape to keep the ribbon in place) and that was it! The result was 5 sugar and spice themed centerpieces that cost about $20 each.


Myself and two other women made homemade drinks for the shower and I made cute signs that I tied (and double sided taped) to the beverage dispensers that I bought from Amazon.com.


and I tied green and pink ribbon around the stemless white wine glasses that I used for the shower to add a fun, girly touch.


Since the shower was sugar and spice themed, we had a light lunch of salads and wraps and then a HUGE dessert. I got the cupcakes and cake from the bakery and everything else was from the bakery at Costco (except for the big lollipops and rock candy, which I got at Party City.)


I made an "Everything Nice" banner using letters printed on individual pieces of card stock and ribbon. I was so busy that I didn't notice when the banner started to sag so I don't have a great picture but I think you can get the idea.


I also did a story book wishing well. I found a cute pink and purple storage bin at Target and I printed a sign with the cupcake from the invitation that said "Baby's First Library."


Everyone had a great time! I hope this post helps give you ideas for throwing a sugar and spice themed shower of your own.


Photobucket